“Small Cushion Box and Storage Cabinet – DIY Plan” has been added to your basket. View basket
DIY Plan 15 m2 modern – Construction drawing frame
£129,90
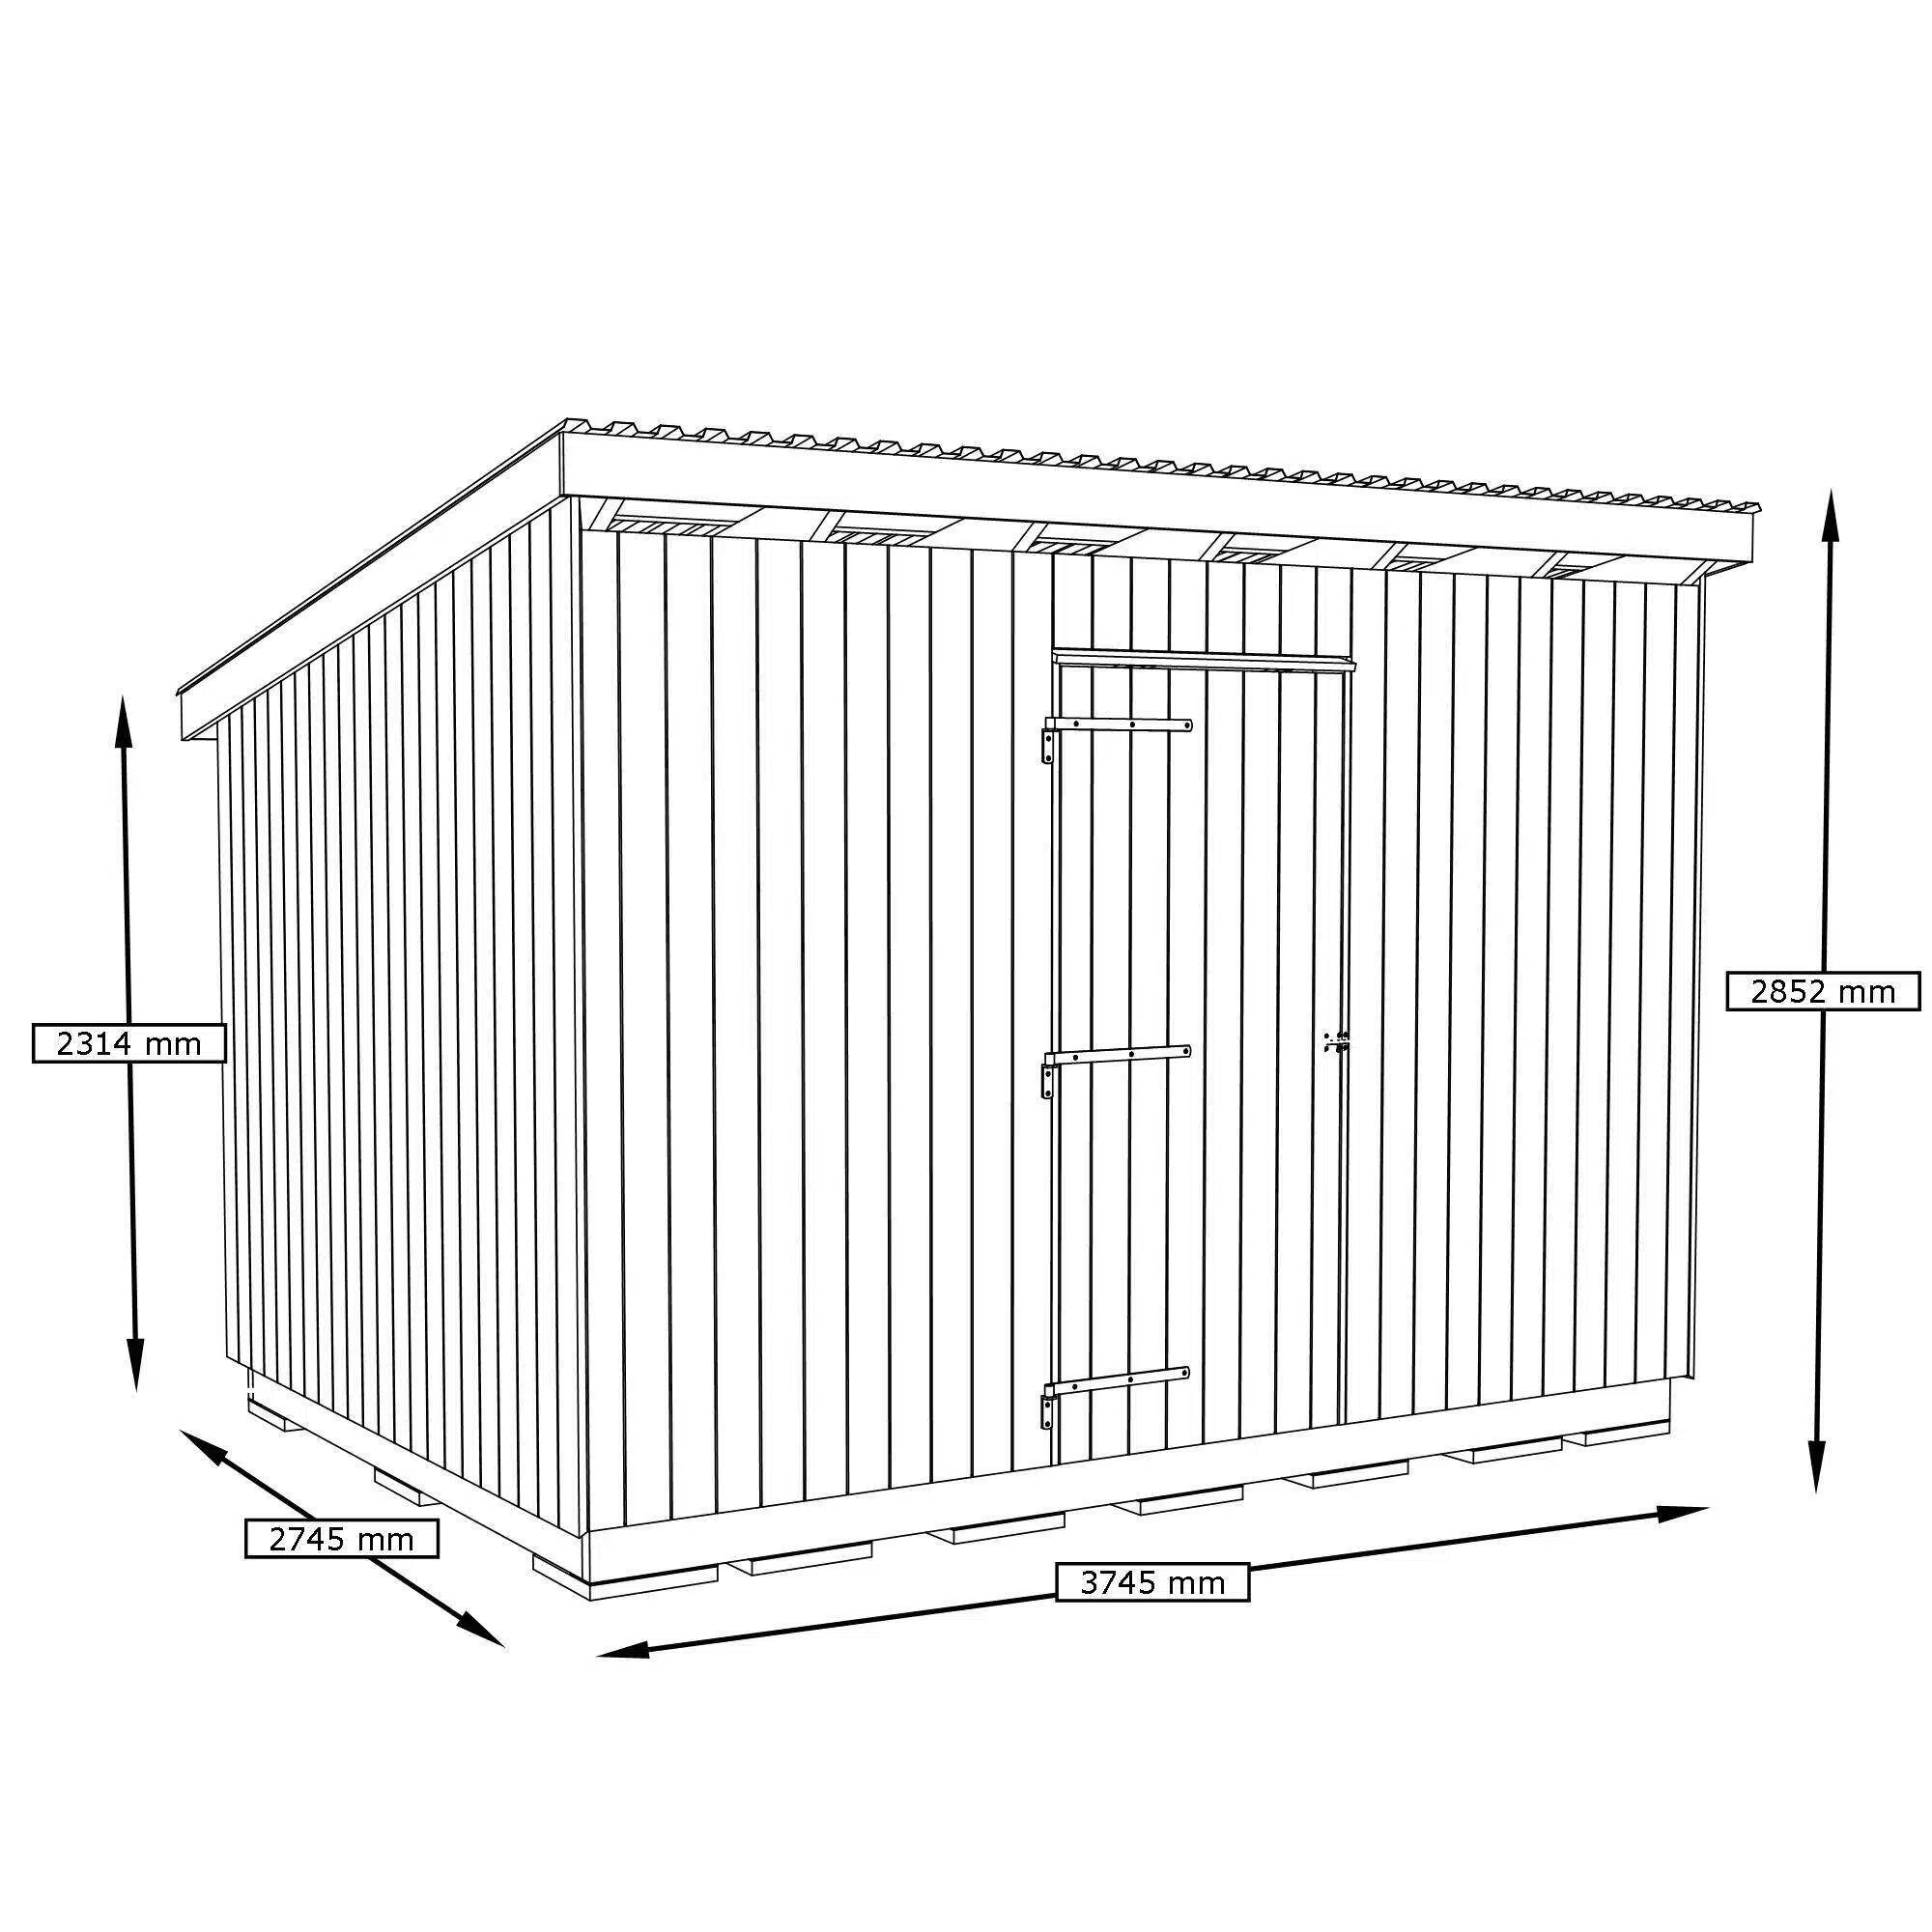
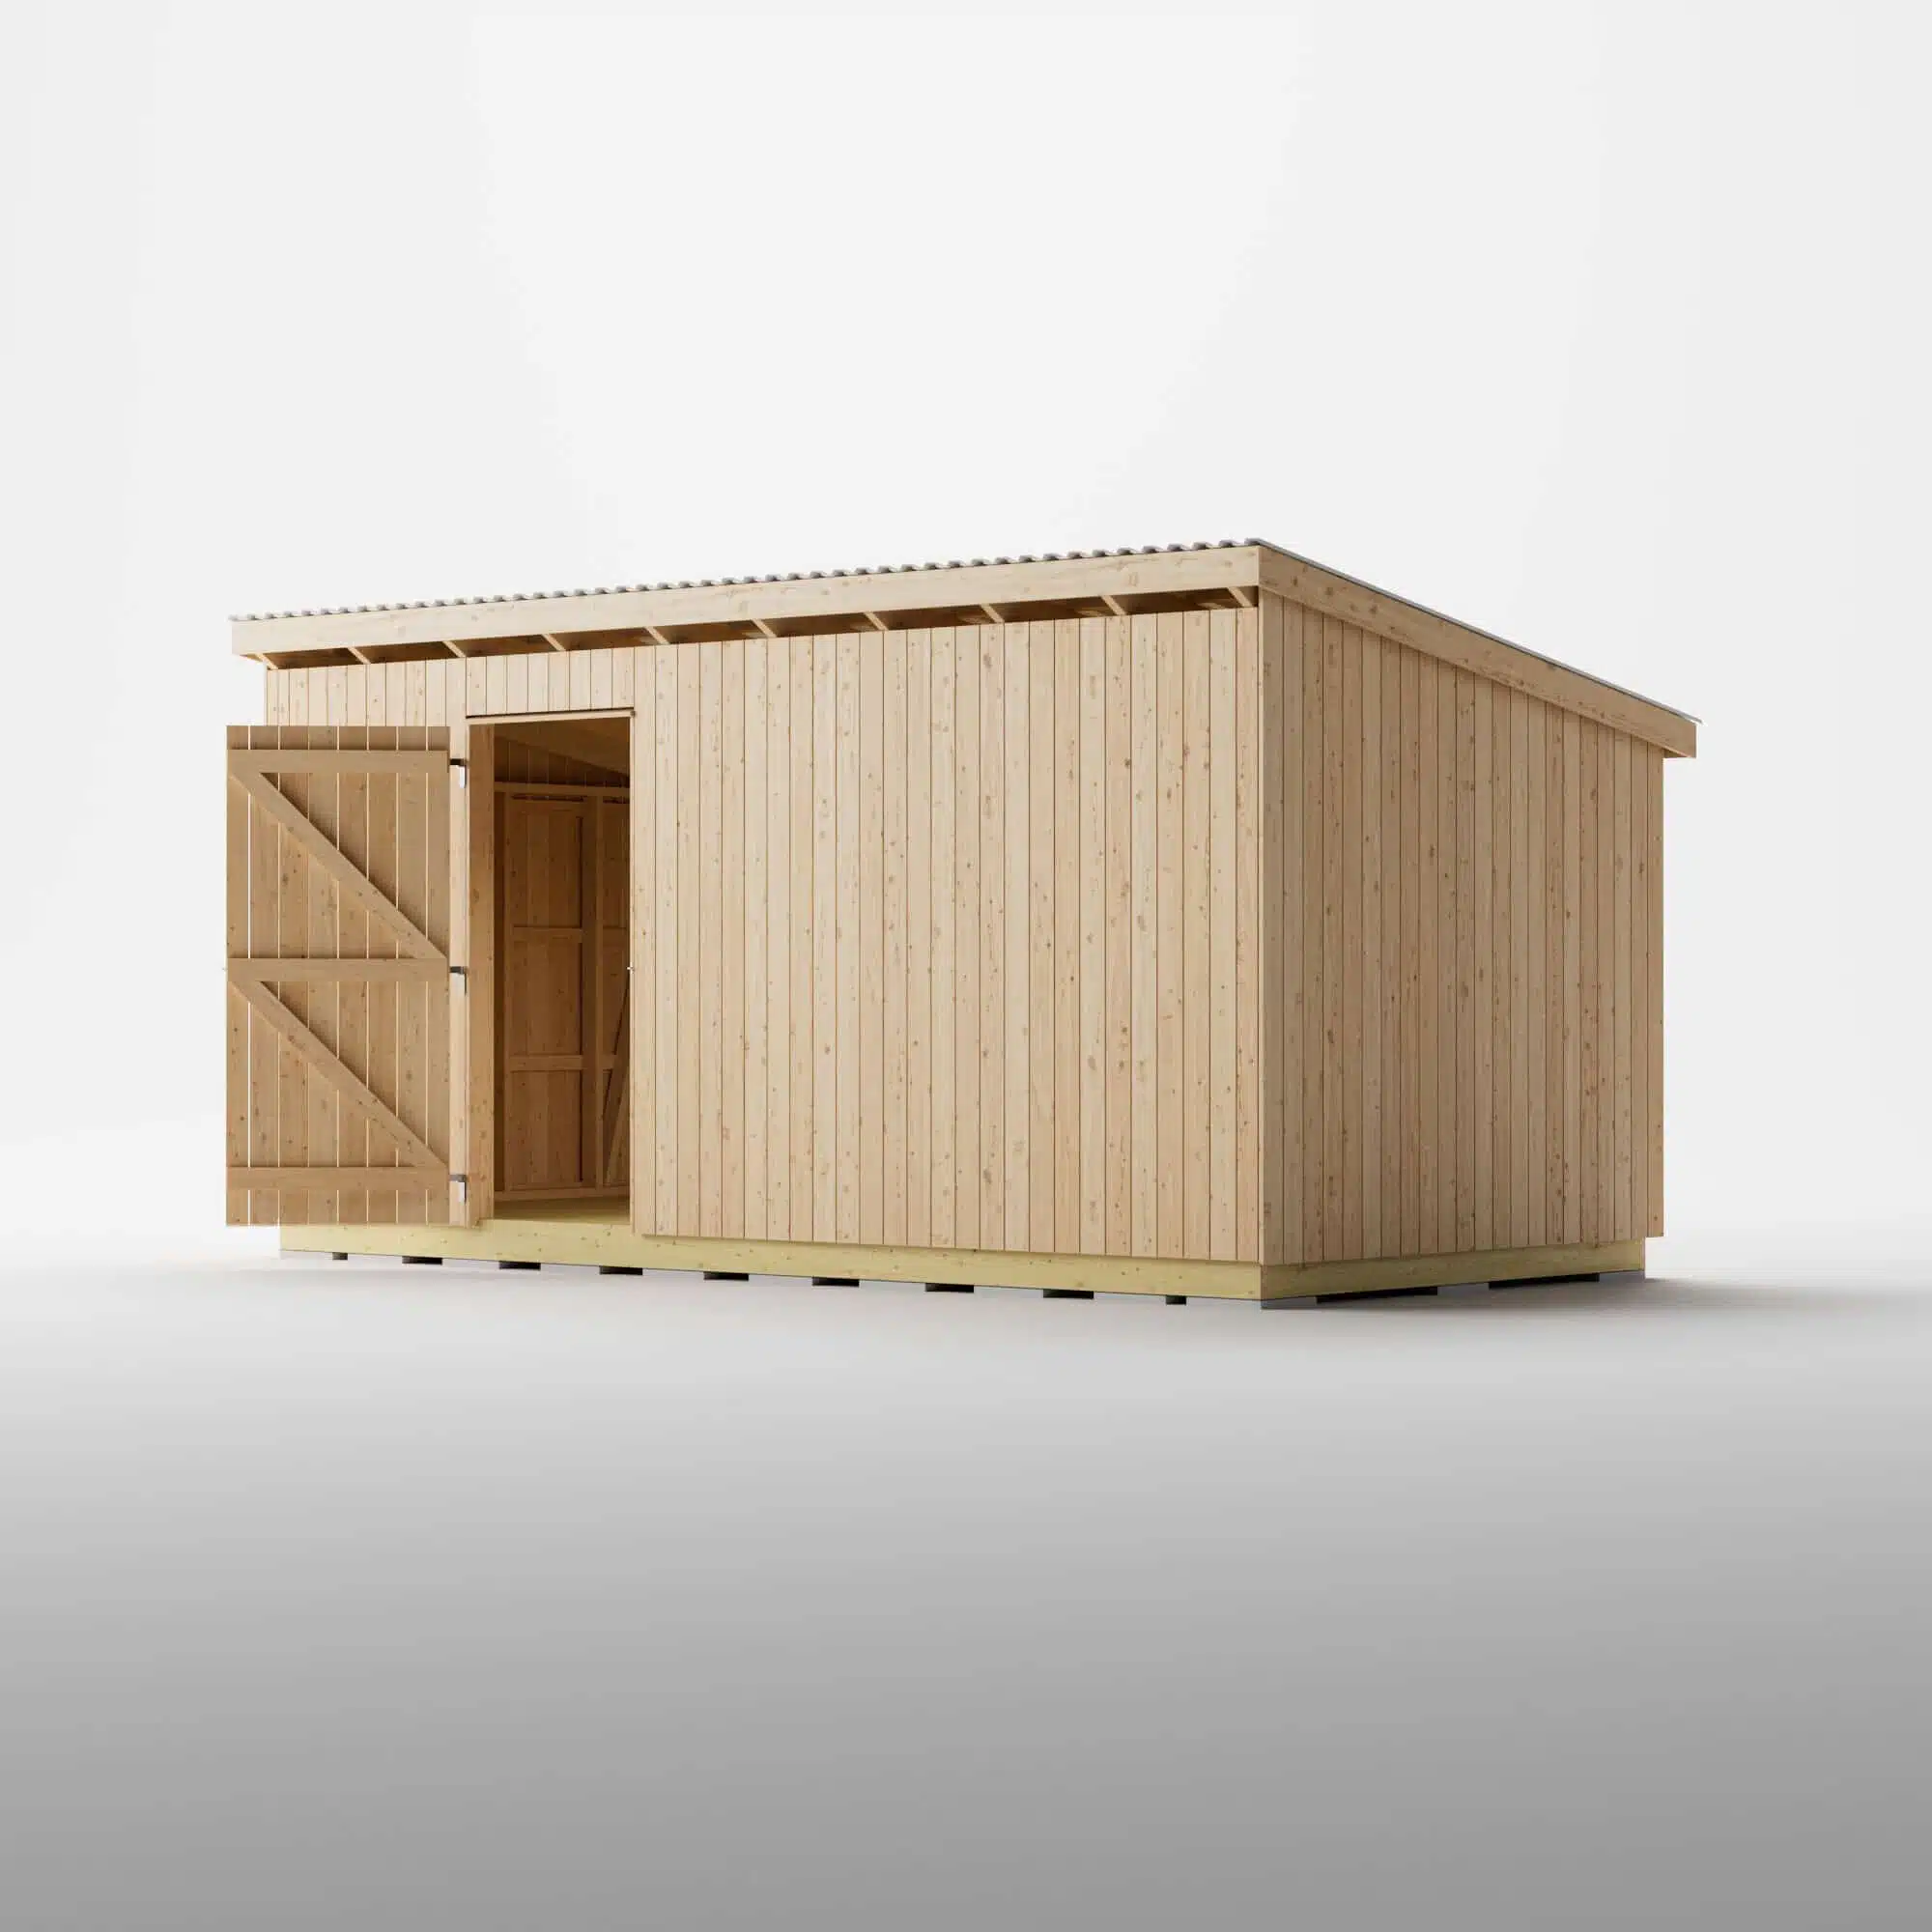
Drawing for the frame of a modern shed of 15 m2 in funkis style. The shed consists of four walls and roof that are drawn to scale and measured. The drawing is delivered in the form of a digital PDF immediately after purchase. Unlike Egenbyggt’s other DIY guides, this drawing is not a complete guide with all the steps, but here you need to have a certain amount of prior knowledge to be able to read the drawing and to build in general. Details such as screws, nails and other fastening materials or sheet metal work are not specified. However, you get a clear drawing for each wall section together with a cutting list for all parts, which saves a lot of time during construction. Once the frame is built, you have a good basis for completing the shed based on your own wishes for exterior paneling and roofing.
Level
Hard
Included in the build plan
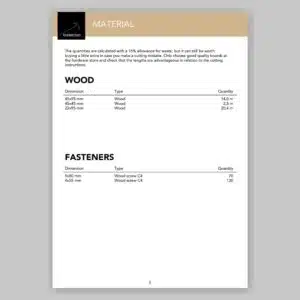
✓ Materials list – everything you need
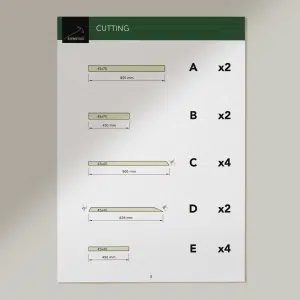
✓ Cut list and clear cutting diagrams
✓ Step-by-step instructions
✓ Clear building illustrations
Construction drawing for the timber frame of a 15 m² freestanding shed in functionalist (funkis) style. Unlike most of our DIY plans, this one is intentionally narrower in scope: it covers the frame in full detail — four walls and the roof structure — but stops short of cladding, roofing, finishes, and fasteners. The aim is to give a confident builder a complete, scaled set of frame drawings to work from, while leaving the visible finish open to your own preferences.
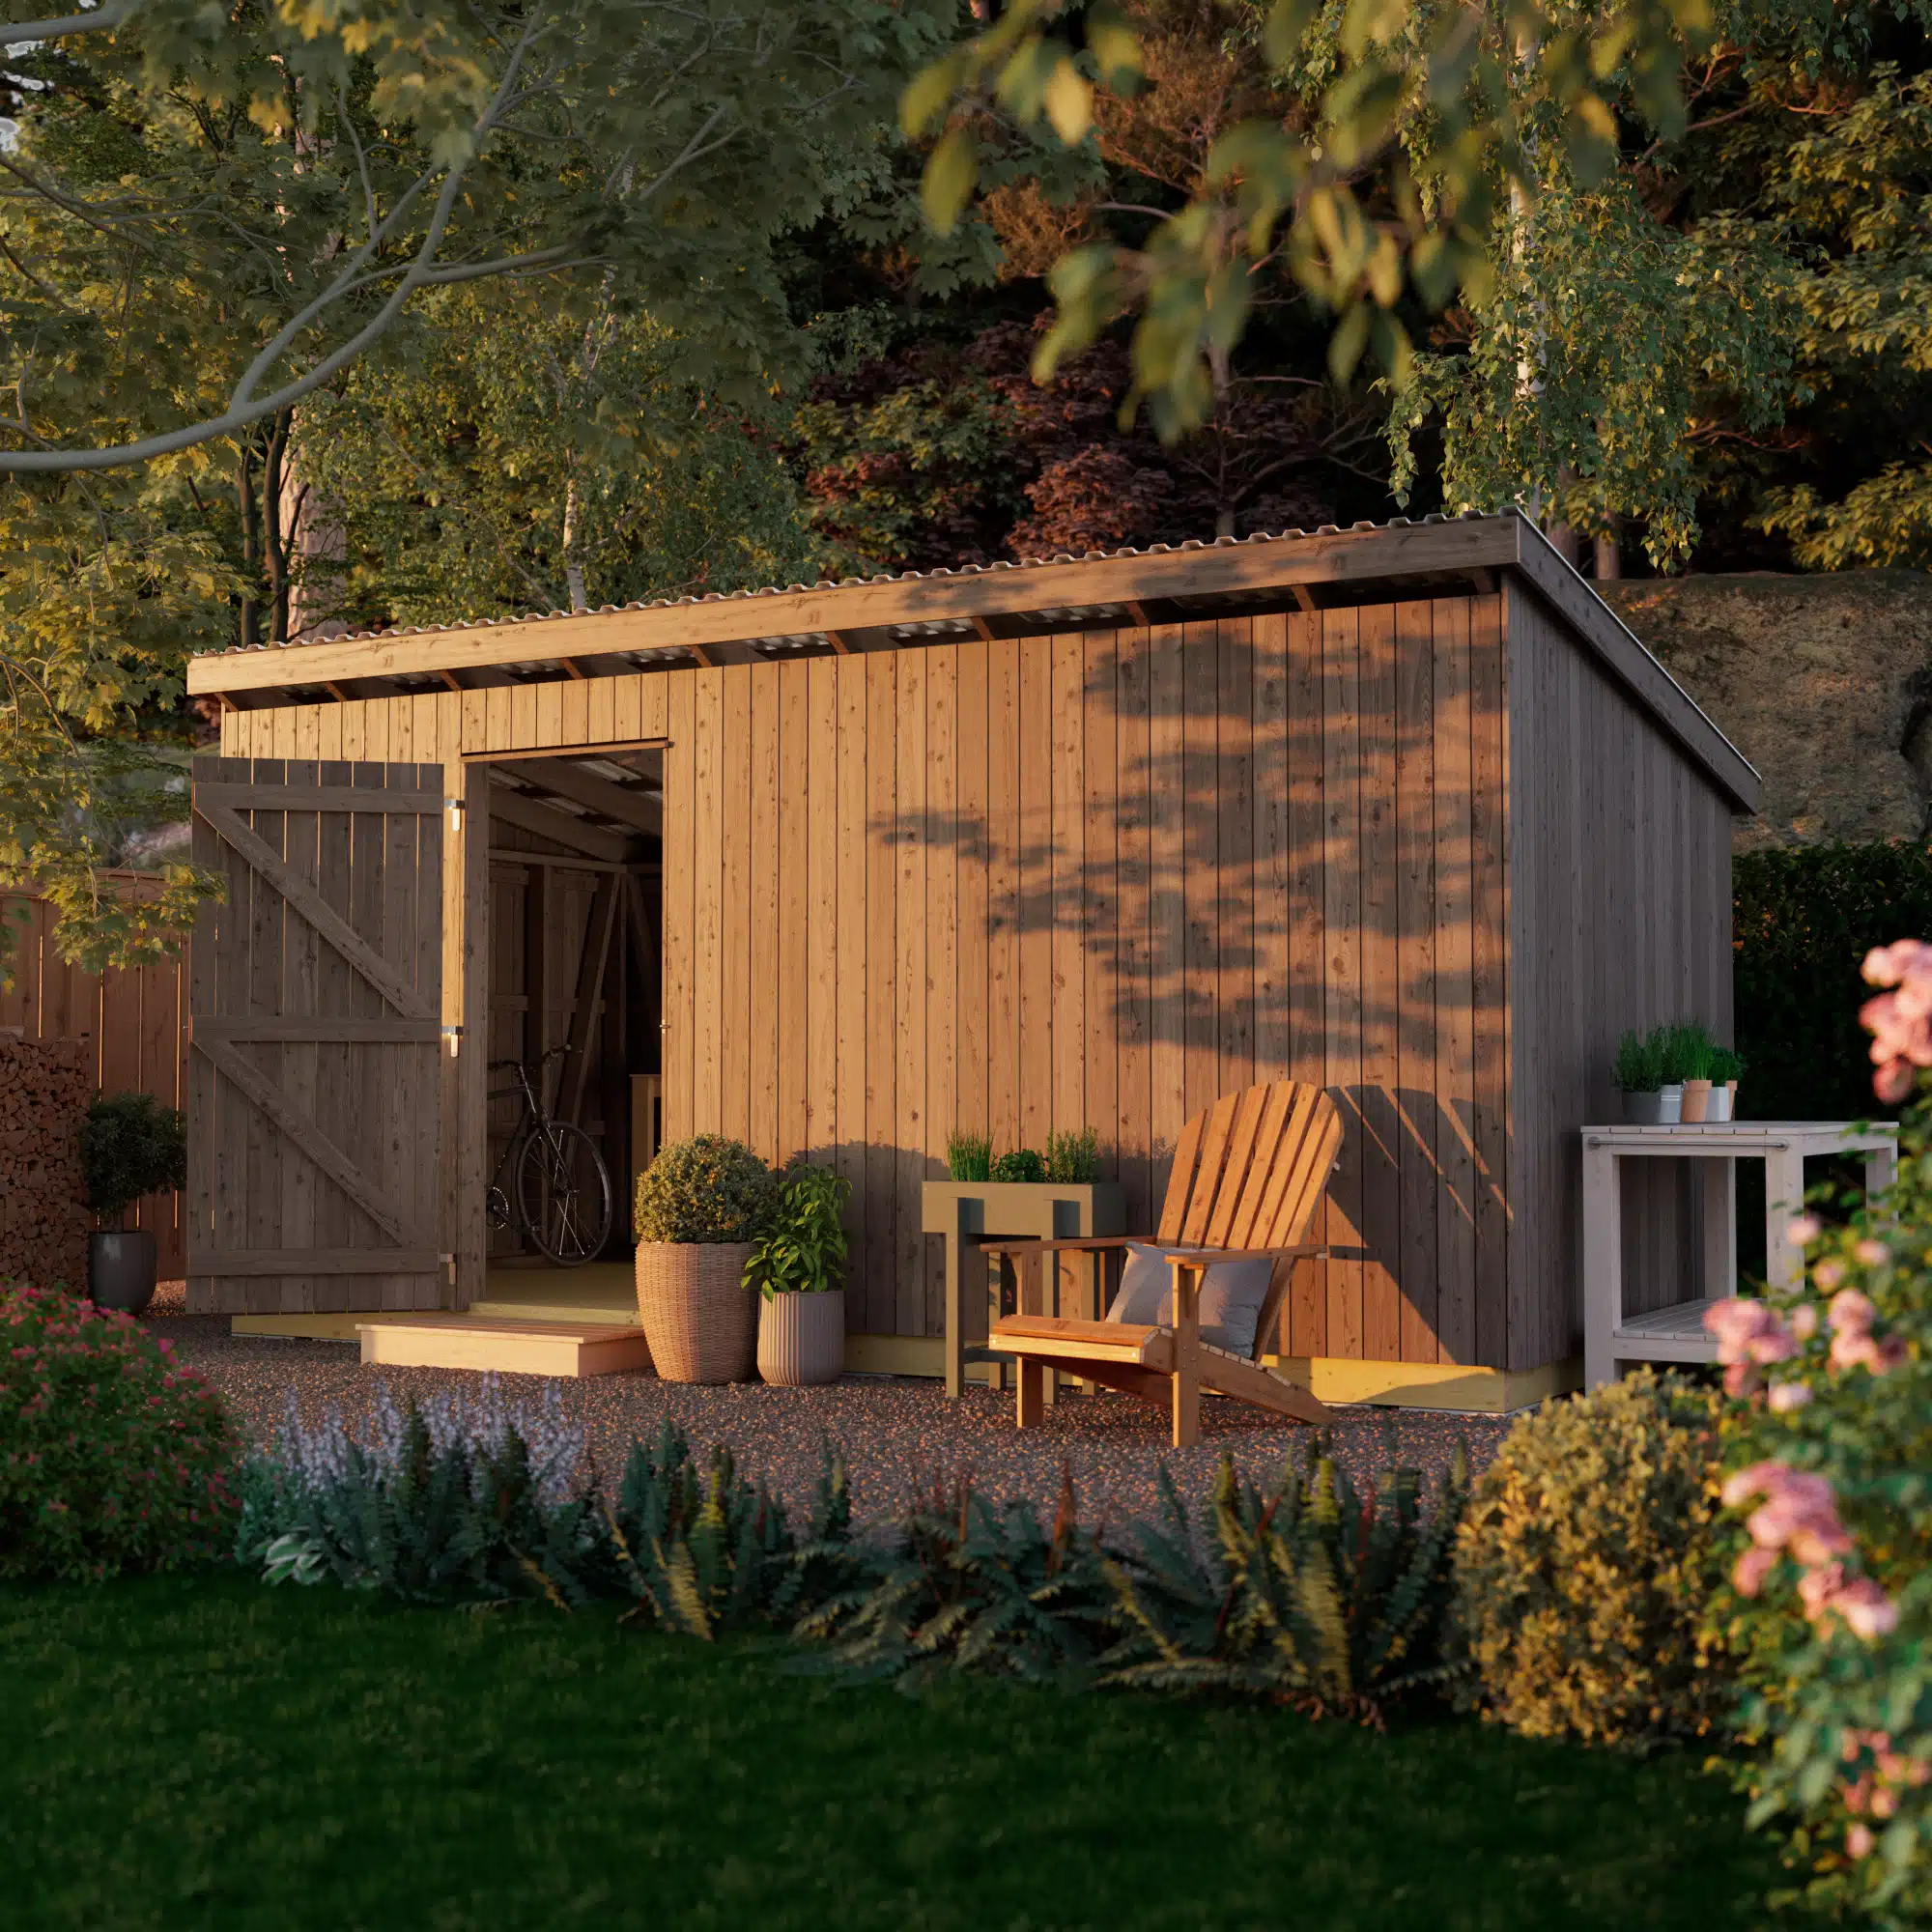
The funkis-style design is restrained and modern: clean, flat lines, generous proportions, and the kind of squared, almost-cubic silhouette that defines the style. At 15 m² the shed sits within typical permit-free building limits in many regions, but local rules vary, so check before you build. The frame is dimensioned for pressure-treated pine and is sized to take standard cladding boards and panel materials, giving you flexibility in the visible finish — board-and-batten, horizontal panelling, or smooth panels can all be applied without rework of the frame.
The drawing is delivered as a digital PDF, downloadable immediately after purchase. It includes scaled drawings for each wall section and the roof, together with a cutting list for the timber. Hardware (screws, nails, fasteners), exterior cladding, roofing, doors, and windows are not specified — those decisions are yours. Because the plan assumes you can read a frame drawing and have built timber structures before, this is best suited to experienced DIY builders or to those working alongside a carpenter, rather than as a first project.
Dimensions
Digital delivery
This is a digital guide. The guide is delivered as a PDF that can be downloaded immediately after purchase or through the order email sent to the specified email address.
The guide contains the information needed to build the product illustrated on this page.
Table of contents of the guide:
Introduction
Tools
Sawing
Mounting
At Egenbyggt, we work hard to deliver high quality. Nevertheless, errors or omissions may creep into our guides and the information we provide on the site. We reserve the right to do so.
If you are not satisfied with a guide you have purchased, please contact us.
To provide a good experience, we use technologies like cookies to store and/or access device information. By consenting to these technologies, we may process data such as browsing behavior or unique IDs on this website. If you do not consent or withdraw your consent, this may negatively affect certain features.
Functional
Always active
The technical storage or access is strictly necessary for the purpose of enabling the use of a specific service requested by the user, or for the sole purpose of carrying out the transmission of a communication over an electronic communications network.
Options
The technical storage or access is necessary for the legitimate purpose of storing preferences not requested by the subscriber or user.
Statistics
The technical storage or access that is used exclusively for anonymous statistical purposes.The technical storage or access that is used exclusively for anonymous statistical purposes. Without a subpoena, voluntary compliance on the part of your Internet Service Provider, or additional records from a third party, information stored or retrieved for this purpose alone is typically not able to be used to identify you.
Marketing
The technical storage or access is required to create user profiles to send advertising or to track the user on a website or across multiple websites for similar marketing purposes.


")


Reviews
There are no reviews yet